Exercise 6 Demo: Part A : The Box Model
Understanding the CSS Box Model
By default all HTML elements have padding and margin added to them. The amount of that default margin and padding is interpreted differently by the various browsers. When we think of the HTML elements in relation to design and layout, we think of them as being in boxes. Margin and padding create space between elements.
Here is an example of content with padding, border and margin. (the example is exaggerated)
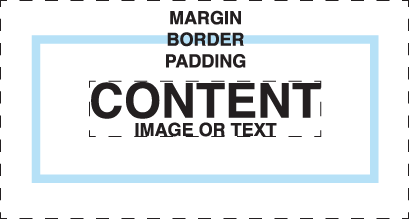
CONTENT: The content of the BOX can be text or images, or both.
PADDING: Adds space around the content. It picks up the background color of the Content Area.
BORDER: The border goes around the padding and the content. You set the width, color and style of the border. The width you choose adds to the space the "BOX" takes up in your layout. Borders are optional and added by you.
MARGIN: Adds space around the border. It is transparent.
As you can see, the content itself visually only seems to take up a certain amount of space. The size of the padding and margin vary depending on the browser it is viewed in unless you define it yourself.
When you use CSS to define a width of your content, you make a set amount that you want it to be. You can also define the padding, margin and border. Remember the actual space that your content takes up in your layout is larger than the width and height you give to your content area. If you have a set width to your container or wrapper area, and your divs do not always fit within the area and one drops below, remember to define and leave room for the margin and padding.
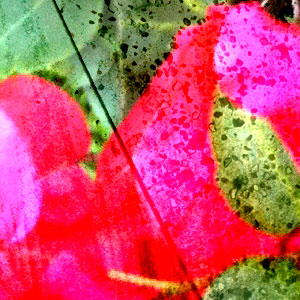
Below is an example of the same image that gradually adds a border, padding and margin that I defined in my CSS document styles. The image is placed in a div, each one has their own id to style to. The first one is <div id="one"> For simplicity, I used the same size of padding, border and margin on all sides. You can make the amount different on all sides as needed. The first div with an image in it has none of these attributes, and each subsequent one adds one piece of information at a time so you can see the effect it has. These are the CSS styles for my div #four.
#four {height: 300px; width: 300px; border: solid 5px #000000; padding: 10px; margin: 20px;}
The final box example (div #five) uses random amounts of information. It is important to understand the use of margin and padding for content placement. Most often you do not use the exact same amount for all sides, but find that a variable amount is what works the best.

© Claudia Faulk. Updated 10.17